
Introduction
As a consequence of COVID-19 pandemic, many organizations have decided to provide a physical network device for their employees to use at home. This kind of devices build a VPN tunnel over the Internet to a VPN concentrator (in the corporate data center for example), They also provide a corporate SSID with access to the internal enterprise resources a user may need.
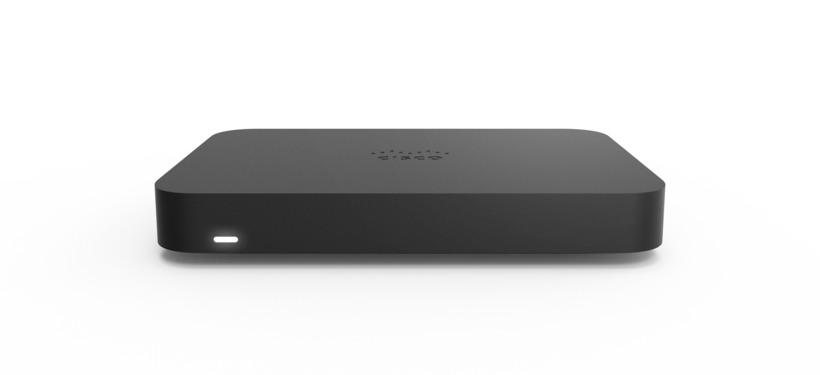
One way of implementing this solution is by using Cisco Meraki. It provides specific devices for remote workers, such as the Meraki Z3 model. These are the main advantages of using Cisco Meraki to implement a teleworkers solution:
- Centralized management and monitoring in the cloud
- Scales well with thousand of devices
- Easy VPN configurations over the Internet with Meraki AutoVPN
- Enterprise-grade functionalities like redundancy for VPN concentrators or 802.1X for the wireless network.
Challenges with the Out-of-the-box solution
There are some challenges however when scaling these teleworkers deployments. A decision has to be made regarding how to configure the devices in a way that it is to identify to which user it belongs. This makes both monitoring and troubleshooting easier. But also identifying the user enables group-based segmentation, where only the resources that a specific user group needs are allowed to be accessed when connect to the corporate network.
The first type of challenges are Business Challenges. There are two things to address ins this category:
- Onboarding thousands of users having control of what gear is delivered and provisioned for each employee may overburden the IT department.
- Security is a top concern as the enterprise network is being extended to the employee’s home. User must have at home the same level of access to internal resources that they have at HQ/branches.
The second type of challenges are more related with Cisco Meraki solution (Z3 devices more specifically). There are some limitations in the configuration options:
- Corporate SSID can be deployed with 802.1X using a RADIUS server to check the user’s Active Directory credentials. Problem is, in Meraki’s Z/MX devices these credentials cannot be used to assign different authorization profiles depending on which group the user belongs to.
- If the device should also provide a personal SSID (to allow personal devices to connect to the Internet), then the user is not able to modify the PSK for this network. This is because the only way to do so is having access to Meraki Dashboard.
The onboarding discussion
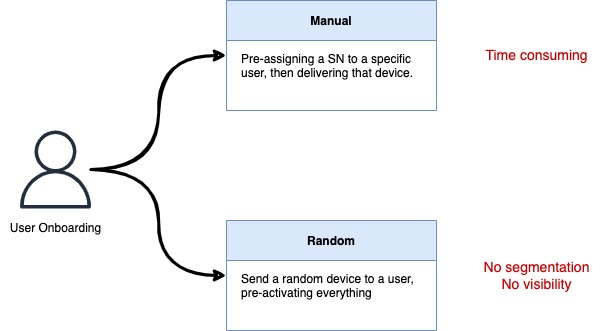
The onboarding topic is one of the most critical. How are devices going to be delivered to the users? There are two ways to solve this that are supported natively in Meraki: The first one is to manually assign a Serial Number to each user and the apply policies to this network (slowest alternative). The second one is to send a random device to each user (insecure and difficult to monitor).
The following picture shows the situation:
The solution: A self-service application
An interesting solution to the challenges seen in previous section is to create an application that remote workers can use to onboard their own device. For example, a web application that is accesible over the Internet (remember that until onboarding is done user may not have VPN access). Nonetheless, the frontend can vary and it will depend on the organization that deploys the solution. The alternatives can be a bot in the corporate messaging tool, or to integrate the device onboarding process in an already existent application.
The application described next seeks to simplify IT’s job, to provide users step-by-step workflows, and to keep user-based segmentation. It is an example of what can be achieved by adding automation to these kind of deployments. The features to highlight are:
- Accesible over the Internet.
- Users don’t need new credentials to log in. They use their corporate credentials in Azure Active Directory. The web application has SAML integration.
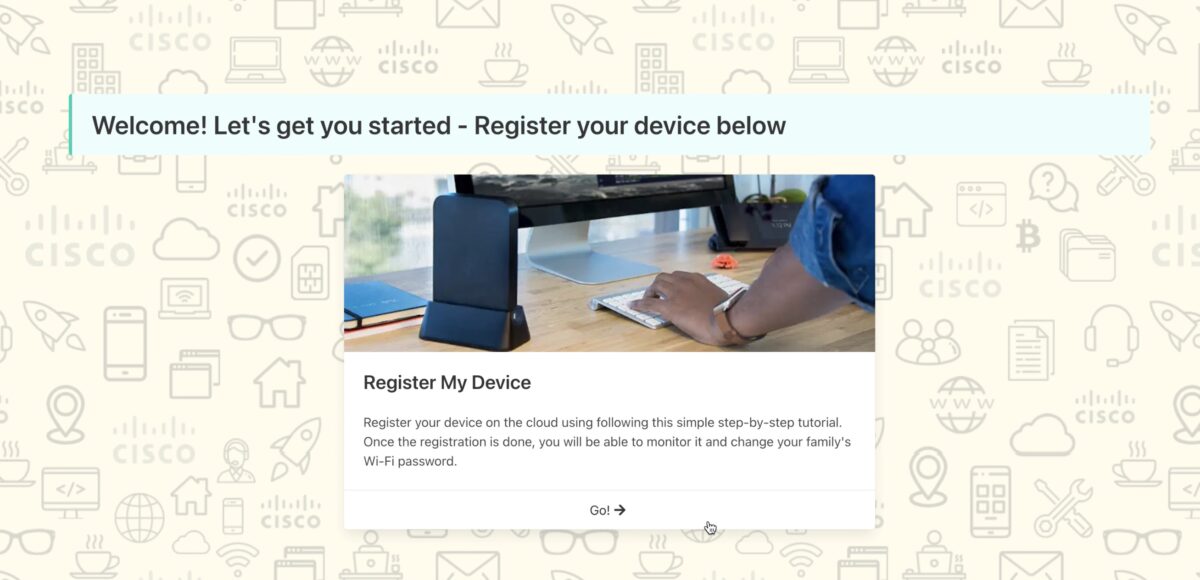
- Once authenticated, users are guided with a step-by-step workflow asking for the Serial Number of the device they’ve received and helping them in the physical installation of this device.
- The applications backend uses the username and the device Serial Number to create a new Meraki network for this specific user.
- The user group will define which blueprint to use at the time of creating the new Meraki network. Different blueprints provide access to different corporate subnets.
- The user can use the application anytime to change the PSK of the personal SSID or to change their device for another with a different Serial Number.
- IT team keeps operating the network using only Meraki Dashboard. Every network created automatically is tagged accordingly.
Note: I am not a programmer, and I build these applications only as conceptual demonstrations. This application is not intended to be used in production, and I do not recommend doing so. You can, however, re-use parts of the code that may find useful, o checking the login behind automating Meraki configurations.
The following short video shows the result:
I’m not going to enter into the details of how the application works in this post. The source code is published in a public GitHub repo so anyone can use it or adapt it. But feel free to contact me if you have any questions,
What I want to explain in this post is the logic and the interaction with Meraki’s cloud. This is what the next section is all about.
Lo que sí se va a analizar es cómo es la lógica y la interacción con Meraki. Esto es lo que explica la sección siguiente.
Interaction of the application with Meraki’s cloud
Pre-requisites on Meraki side
First, it is mandatory to have a Meraki Organization with Dashboard APIs enabled. As a recommendation, create a new Meraki user on for API access. Second, all devices have to be uploaded in the Meraki Organization inventory list. The application will the claim these devices and associate them to specific Meraki networks.
Blueprints
The most efficient way of working with these type of applications is to have templates, or blueprints. Each template is going to be associated with a user group. Therefore, the difference between two templates is going to be what subnets a user is going to be allowed to access when connected to the Meraki device.
Meraki has a template functionality built-in and it is valid to thing of using it. First advantage is that only modifying a template will modify the same value in every Meraki network attached to it. The second advantage is that templates provide an auto-addressing function that automatically assigns non-overlapping IP subnets to each device. If anyone wants to know more about templates in Meraki, the documentation is found in this link.
However, this application does not use templates. Why? Meraki networks attached to templates loose flexibility regarding which configurations can be done on a single network. In particular, there is no way to configure a different PSK to the personal Wi-Fi network. To avoid this and other limitations that may show up, the templates functionality is not used, and the word blueprint is going to be used from now on to avoid any confusions.
A blueprint is a Meraki network (a network, not a template). This network holds are the configuration needed to a typical deployment. For example:
- VPNs toward VPN concentrators.
- Access Control Lists.
- Corporate LAN subnet (dummy, will be modified by the application).
- Personal LAN subnet (Internet access only, is the same for every device).
- Corporate SSID with 802.1X authentication.
- Personal SSID with PSK authentication (dummy password, will be modified by the application).
During the onboarding process, new networks for the devices are going to be created by cloning the blueprints. Cloning a network is another Meraki functionality, one that is leveraged in this case by the application.
Note: Something important to be aware of is that blueprints need an associated Z/MX device. Not doing so makes Meraki Dashboard hide security and wireless configuration options for the blueprint. Once the blueprint is configured, the device can be unclaimed (the configuration remains available using APIs).
Note2: A suggestion, use a logical name for blueprints to help administrators identifying them. In my case I’ve used “App-Blueprint-<AD-group>“.
Application tasks
Let’s describe now the application itself. The code repository shows all the needed configuration to deploy it (things like integrations with Meraki and with Azure AD). Let’s make a high-level review of its tasks.
- It must obtain the user credentials using SAML authentication against Azure AD. In this step the application gets the username and the group the user belongs to.
- It asks the user the Serial Number of the Meraki device that was received.
- With the three values obtained from the previous steps, the application can first select the blueprint associated with the user group. A new Meraki network is created by cloning this blueprint.
- The application will user the username to name the network. Doing so makes future motoring and troubleshooting easier.
- In order for an IT admin to be able to make changes to multiple Meraki networks associated to the same blueprint (considering that templates are not used), Tags are used. The new Meraki network will have two tags: one with the blueprint name it was cloned from, and one with the “teleworker” keyword.
- This new Meraki network needs a corporate LAN subnet to access resources over the VPN. The applications segments a super-network for this (configured at deploying time). It guarantees that the segment used for a network does not overlap with the one used by any other teleworker network.
- It will assign a random PSK for the personal Wi-Fi network.
- Once the Meraki network is created, the corresponding Z/MX device will be associated to it.
- A database stores the information related to the user to allow future configurations made by the user itself. Two examples are: modifying the PSK for the personal SSID and replacing the Meraki device with another in case of failure.
Meraki’s Dahsboard APIs – Endpoints used
As a reference, these were the most important endpoints used by the application to perform the tasks. Meraki APIs below correspond with Dashboard APis v1 that are documented here. You can use the link to get more details into how to build the different calls.
| GET /organizations/{organizationId}/inventoryDevices/{serialNumber} |
| A quick check to know if the device SN is uploaded in Meraki Organization’s inventory. Only checking response status code 200 is enough. |
| POST /organizations/{organizationId}/networks |
| Creates the new Meraki network. The most important thing about this call is to indicate that a blueprint is going to be cloned by including on the request body the field copyFromNetworkId with the blueprint network ID as the value. If the operation was successful, the response body will contain the id that identifies the new network. This value will be used for following configurations. |
| PUT /networks/{networkId}/appliance/vlans/10 |
| This endpoint is used to modify VLAN 10 subnet. This VLAN is the one propagated in the VPN and used in the corporate SSID, thus the associated subnet must be unique. Once the application calculates a non-overlapping subnet, it sends this subnet in the request body using fields subnet and applianceIp. The latter value indicates the local network default gateway, which in this case is the first IP address. |
| GET /networks/{networkId}/appliance/vpn/siteToSiteVpn |
| This endpoint retrieves the VPN concentrators information when networkId equals the blueprint ID that is being cloned. |
| PUT /networks/{networkId}/appliance/vpn/siteToSiteVpn |
| Once the blueprint VPN data is retrieved, is used to modify the values for the Meraki network associated with the devices that is being onboarded. networkId in this call equals the new Meraki network ID. The VPN configuration has to be modified because it indicates the local corporate subnet. The subnets field holds an array of objects, and the application puts the network associated with VLAN 10 here. The structure of the request body is better explained in the documentation. |
| POST /networks/{networkId}/devices/claim |
| This call is used to clain the device in the new network. The Serial Number has to be indicated inside an array and passed as the value of the serials field. Se usa esta llamada para agregar dispositivo del usuario a la red nueva creada. Hay que indicar el Serial Number dentro de un array en el campo serials. |
Besides all this calls, building the new network requires assigning the PSK for the personal SSID. Problem is, Meraki Dashboard APIs v1 didn’t have and endpoint for this when the application was developed. Specifically, there was no endpoint to configure SSIDs for Z/MX devices. Because of this, an endpoint from Dashboard APIs v0 was used as a workaround.
| PUT https://api.meraki.com/api/v0/networks/{networkId}/ssids/{ssidNumber} |
| This endpoint allows the configuration of SSIDs, identified with ssidNumber = 2, The request body holds a psk field with the new password. |
Now, revisiting the docs when I was writing this post it seems that in Dashboard APIs v1.25.0 a new endpoint was added just for this. I haven’t had a chance to test it yet, but if anyone wants to give it a try it can be found here.
This entry finishes here, and I invite any of you that needs to use any of the functions of this application to check the source code in more detail in the repository. Again, is only a PoC application so the code can contain mistakes and is by no means ready for production use. But is a good way of using the potential of these solutions and optimize work.
I really hope you found this post interesting, and remember that if you have any questions you can get in touch with me in the comments or on social networks.